The Gist
Now that we have a domain and a server, we can connect the two using DNS records. DNS (domain name system) records are usually put into your registrar and direct people looking up your website to the server where your website and other things will be.
Get your IPv4/IPv6 addresses from your VPS provider and put them into A/AAAA records on your registrar. Simple process, takes a minute, but here's a guide with a million images just so you know.
Open up your Registrar
As before, we will be using any registrar of your choice and Vultr as a server host. Go ahead and log into your accounts on both. Open up your registrar, or your registrar, and click on your domain and then a choice for "DNS records." You’ll want to see something like this on your registrar’s site.
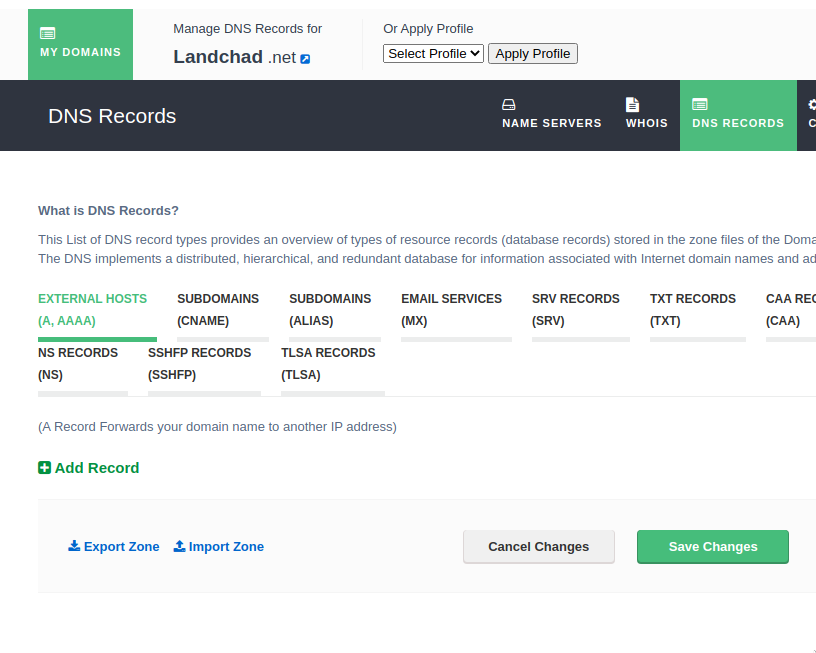
Note that we are on the "External Hosts (A, AAAA)" tab by default. There may be default settings set by your registrar. If there are, you can go ahead and delete them so they look clean like the picture above.
All we have to do now is get our IP addresses from Vultr and add new DNS records that will send connections to our server.
Keep the registrar tab open and open Vultr and we will copy-and-paste our IP addresses in.
Find your server's IP addresses
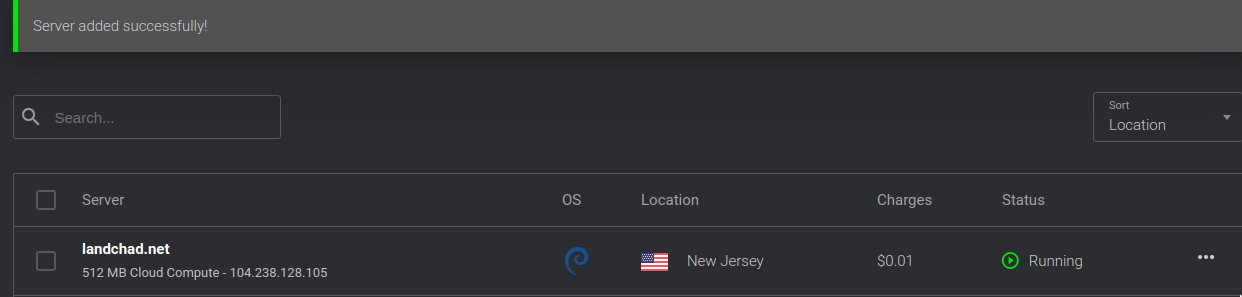
Looking at your server in the Vultr menu, you should see a number next
to it. Mine here is 104.238.126.105 as you can see below the server
name (which I have named landchad.net after the domain I will soon
attach to it). That is my IPv4 address.
Copy your IPv4 address and on your registrar’s site, click the "Add Record" record button and add two A entries pasting in your IPv4 address like I've done for mine here.
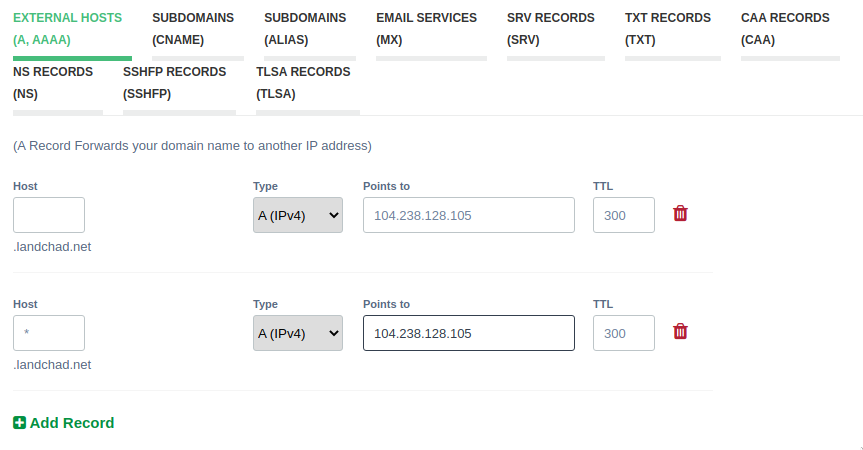
I add two entries. One has nothing written in the "Host" section. This
will direct connections to landchad.net over IPv4 to our IP address.
The second has a * in the "Host" section. This will direct
connections to all possible subdomains to the right place too, I mean
mail.landchad.net or blog.landchad.net and any other subdomain we
might want to add later.
Now let's get our IPv6 address, which is a little more hidden for some reason. IPv6 is important because we are running out of IPv4 addresses, so it is highly important to allow connections via IPv6 as it will be standard in the future. Anyway, now back on Vultr, click on the server name.
On the server settings, click on settings and we will see we are on a submenu labeled "IPv4" where we see our IPv4 address again.
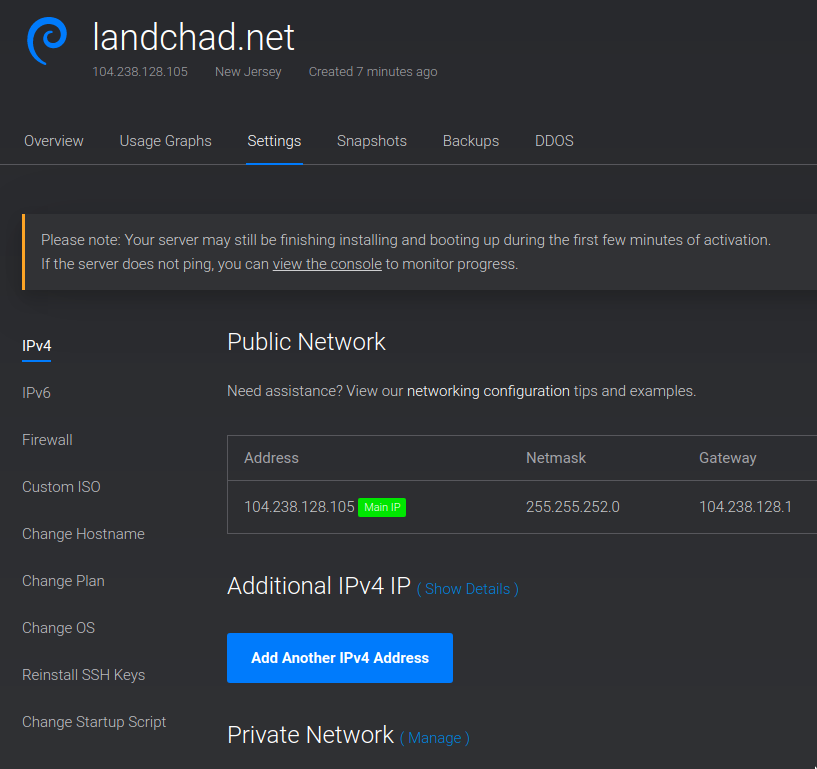
Now just click on the IPv6 submenu to reveal your IPv6 address.
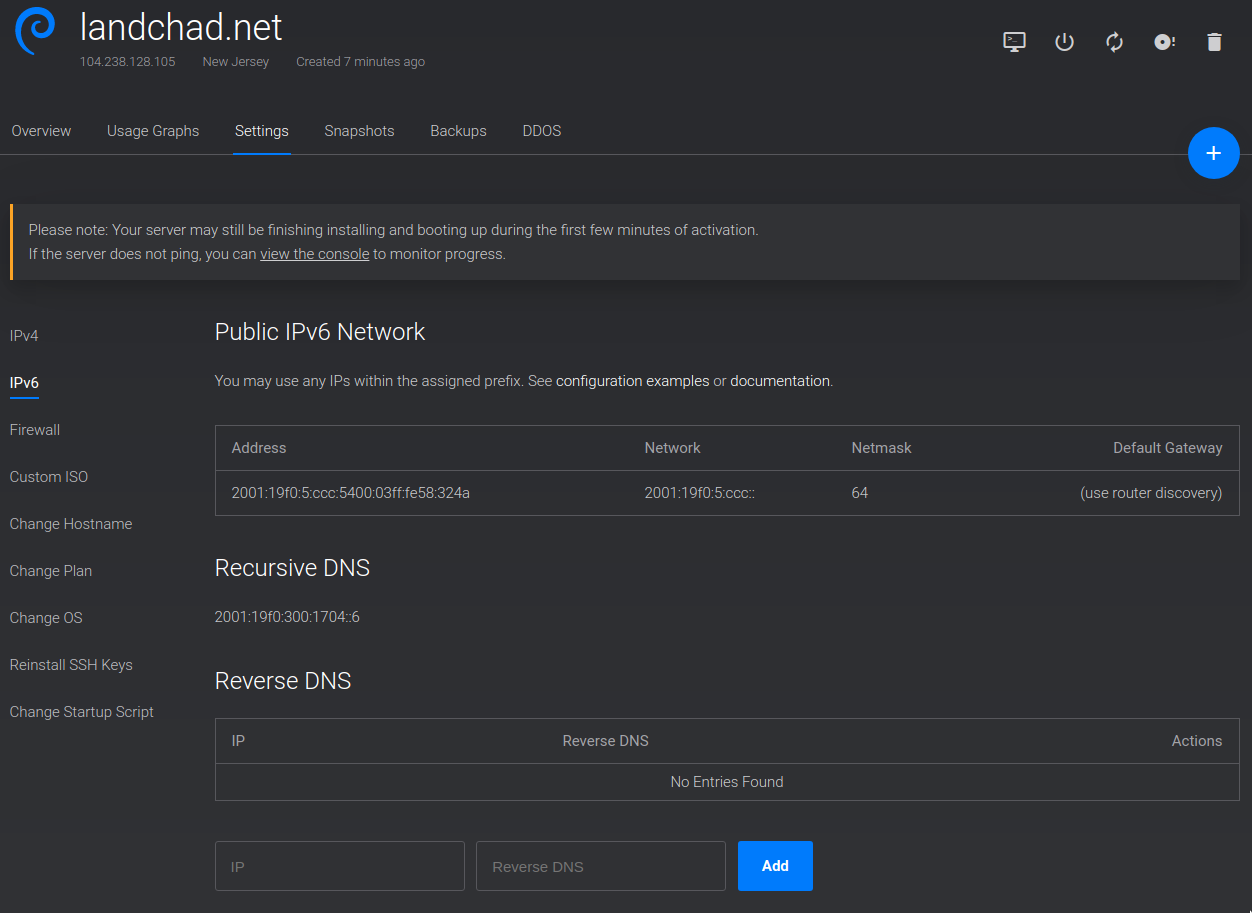
That ugly looking sequence of numbers and letters with colons in between
(2001:19f0:5:ccc:5400:03ff:fe58:324a) is my IPv6 address. Yours will look
something like it. Now let's put it into your registrar’s site. This time, be
sure to select to put in AAAA records as below:
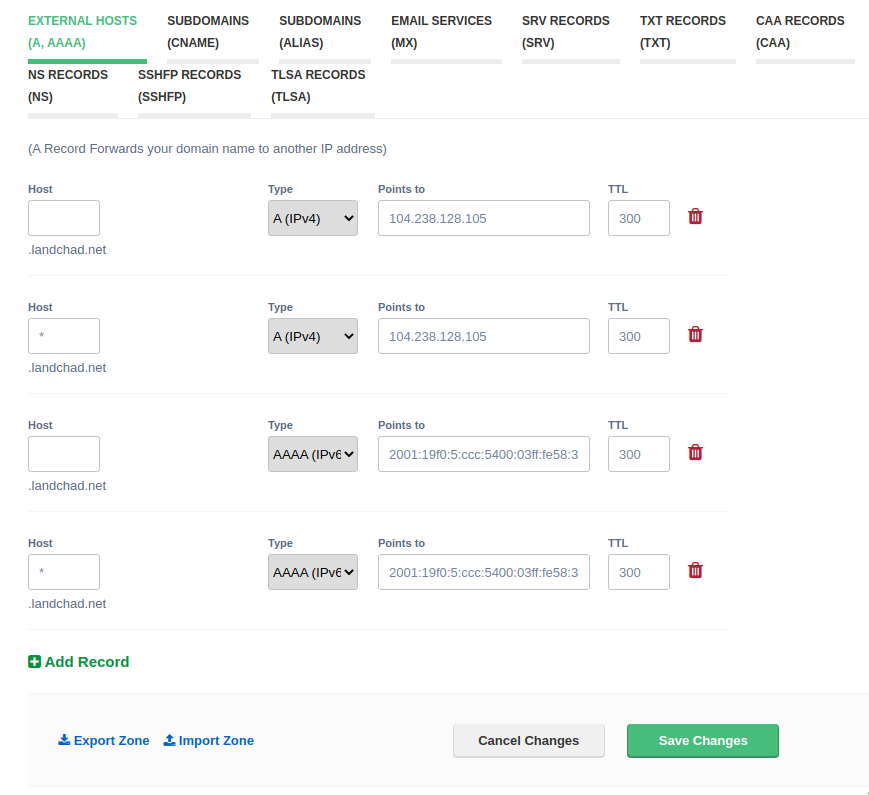
Now just click "Save Changes." It might take a minute for the DNS settings to propagate across the internet.
Test it out!
Now we should have our domain name directing to our new server. We can check by pinging our domain name, check this out:
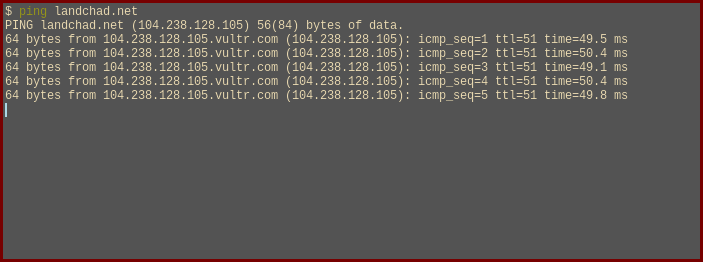
As you can see, our ping to landchad.net is now being directed to
104.238.128.105. That means we have successfully set up our DNS
records! You can also run the command host if you have it, which will
list both IPv4 and IPv6 addresses for a domain name.