 ejabberd
Ejabberd is a server for the XMPP protocol written in Erlang. It’s more scalable, and easier to setup than Prosody due to having most of its modules built-in and pre-configured by default.
Prerequisites
Subdomains
Ejabberd presumes that you have already created all the required and optional subdomains for its operation prior to running it.
Depending on the usecase, you may need any or all of the following domains for XMPP functionality:
- example.org - Your XMPP hostname
- conference.example.org - For
mod_muc, Multi User Chats (MUCs) - upload.example.org - For
mod_http_upload, file upload support - proxy.example.org - For
mod_proxy65, SOCKS5 proxy support - pubsub.example.org - For
mod_pubsub, publish-subscribe support (A fancier RSS)
Only the example.org domain is required for basic, private chat usage.
If you do not wish to use a certain domain, just disable it’s associated module and ejabberd won’t complain when it can’t find it’s associated certificate.
For example, if you don’t want Publish-Subscribe support, just comment out the mod_pubsub config in /etc/ejabberd.yml:
##  mod_pubsub:
##    access_createnode: pubsub_createnode
##    plugins:
##      - flat
##      - pep
##    force_node_config:
##      ## Avoid buggy clients to make their bookmarks public
##      storage:bookmarks:
##        access_model: whitelist
This guide will assume all these subdomains have been created.
Custom Subdomains
If you wish to customize any of these domains, edit /etc/ejabberd.yml and under every appropriate module that needs a subdomain, add the following setting:
mod_muc:
  host: muc.example.org
Installation
To get the latest version of ejabberd, you need to first setup the ejabberd apt repositories:
curl -o /etc/apt/sources.list.d/ejabberd.list https://repo.process-one.net/ejabberd.list
curl -o /etc/apt/trusted.gpg.d/ejabberd.gpg https://repo.process-one.net/ejabberd.gpg
Then update the repositories and install the ejabberd package:
apt update
apt install ejabberd
Configuration
The ejabberd server is configured in /etc/ejabberd/ejabberd.yml.
Changes are only applied by restarting the ejabberd daemon in systemd:
systemctl restart ejabberd
Hostnames
The XMPP hostname is specified in the hosts section of
ejabberd.yml:
hosts:
  - example.org
Certificates
Unlike Prosody, ejabberd doesn't come equipped with a script that can automatically copy over the relevant certificates to a directory where the ejabberd user can read them.
One way of organizing certificates for ejabberd is to have them stored
in /etc/ejabberd/certs, with each domain having a separate directory
for both the fullchain cert and private key.
Using certbot, this process can be easily automated with these commands:
DOMAIN=example.org

# Set the domain names you want here
declare -a subdomains=("" "conference." "proxy." "pubsub." "upload.")

for i in "${subdomains[@]}"; do
    certbot --nginx -d $i$DOMAIN certonly
    mkdir -p /etc/ejabberd/certs/$i$DOMAIN
    cp /etc/letsencrypt/live/$i$DOMAIN/fullchain.pem /etc/ejabberd/certs/$i$DOMAIN
    cp /etc/letsencrypt/live/$i$DOMAIN/privkey.pem /etc/ejabberd/certs/$i$DOMAIN
done
Note: Just like with Prosody, you might want to write this script to a file and setup a cronjob to run it periodically. This should help prevent your certificates from expiring.
Make sure all the certificates are readable by the ejabberd user:
chown -R ejabberd:ejabberd /etc/ejabberd/certs
To enable the use of all these certificates in ejabberd, the following configuration is necessary:
certfiles:
  - "/etc/ejabberd/certs/*/*.pem"
Admin User
The admin user can be specified in ejabberd.yml under the acl
section:
acl:
  admin:
    user: admin
This would make admin@example.org the user with administrator privileges.
File Uploads
To ensure full compliance with XMPP standards, add the following configuration to mod_http_upload:
mod_http_upload:
    put_url: https://@HOST@:5443/upload
    docroot: /var/www/upload
    custom_headers:
      "Access-Control-Allow-Origin": "https://@HOST@"
      "Access-Control-Allow-Methods": "GET,HEAD,PUT,OPTIONS"
      "Access-Control-Allow-Headers": "Content-Type"
Make sure to create and give the ejabberd user ownership of /var/www/upload or any other directory you choose to use for file uploads:
chown -R ejabberd:ejabberd /var/www/upload
Message Archives
The ejabberd server supports keeping archives of messages through its mod_mam module. This can be enabled by uncommenting the following lines:
mod_mam:
  assume_mam_usage: true
  default: always
Database
Why use a database?
We can find the following comment in the mod_mam section of /etc/ejabberd.yml:
mod_mam:
  ## Mnesia is limited to 2GB, better to use an SQL backend
  ## For small servers SQLite is a good fit and is very easy
  ## to configure. Uncomment this when you have SQL configured:
  ## db_type: sql
As these comments imply, an SQL backend is strongly recommended if you wish to use your ejabberd server for anything more than just testing. Ejabberd supports MySQL, SQLite and PostgreSQL. For the purpose of efficiency, this guide will use PostgresSQL because other server software like Matrix and PeerTube support it.
Installing PostgreSQL
PostgreSQL is available in the Debian repositories:
apt install postgresql
In addition, you will have to install the appropriate headers for Erlang, the language ejabberd is written in, so it can actually interact with the PostgreSQL server:
apt install erlang-p1-pgsql
Start the PostgreSQL daemon to begin using it:
systemctl start postgresql
Creating the Database
To create the database, first create a PostgreSQL user for ejabberd:
su -c "createuser --pwprompt ejabberd" postgres
Then, create the database and make ejabberd its owner:
su -c "psql -c 'CREATE DATABASE ejabberd OWNER ejabberd;'" postgres
Importing Database Scheme
Ejabberd does not create the database scheme by default; It has to be imported into the database before use.
su -c "curl -s https://raw.githubusercontent.com/processone/ejabberd/master/sql/pg.sql | psql ejabberd" postgres
Configuring ejabberd to use PostgreSQL
Finally, add the following configuration to ejabberd.yml:
sql_type: pgsql
sql_server: "localhost"
sql_database: "ejabberd"
sql_username: "ejabberd"
sql_password: "psql_password"

default_db: sql
That line at the end sets every module’s database to default to the sql backend. This includes the mod_mam module, so all our data is being stored with PostgreSQL.
Voice and Video Calls
Ejabberd supports the TURN and STUN protocols to allow internet users behind NATs to perform voice and video calls with other XMPP users. This is enabled by default using ejabberd_stun.
However, if you plan on running ejabberd alongside other applications that require TURN and STUN, such as Matrix, then you’ll have to setup your own external TURN server using Coturn.
Setup with Coturn and mod_stun_disco
Firstly, setup a TURN and STUN server with Coturn, using an authentication secret.
Then, edit mod_stun_disco to contain the appropriate information for
your turnserver:
  mod_stun_disco:
    secret: "your_auth_secret"
    services:
      -
        host: turn.example.org
        type: stun
      -
        host: turn.example.org
        type: turn
Using ejabberd
Registering the Admin User
To begin using ejabberd, firstly start the ejabberd daemon:
systemctl restart ejabberd
Then, using ejabberdctl as the ejabberd user, register the admin user which is set in ejabberd.yml:
su -c "ejabberdctl register admin example.org password" ejabberd
This will create the user admin@example.org.
Using the Web Interface
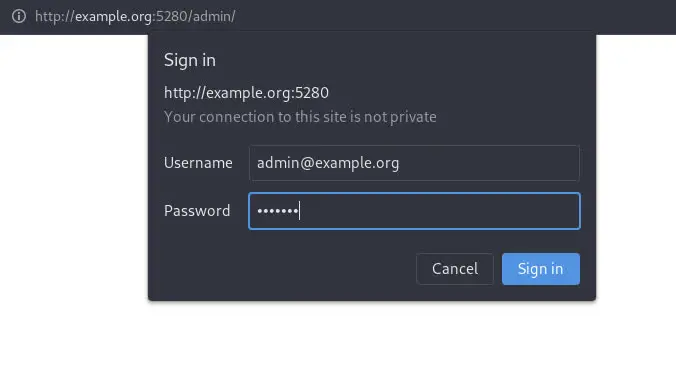
By default, ejabberd has a web interface accessible from http://example.org:5280/admin. When accessing this interface, you will be prompted for the admin credentials:
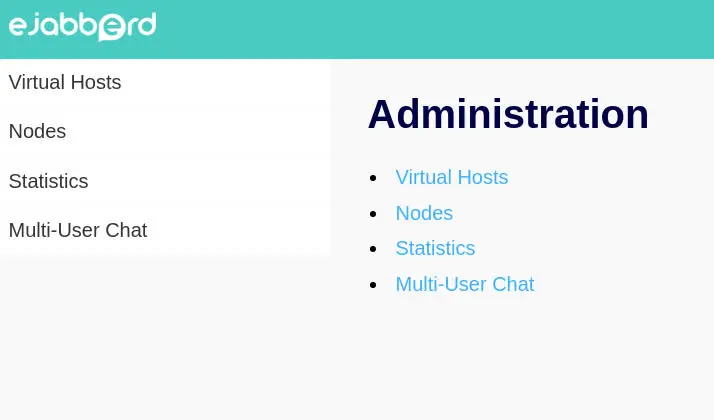
After signing in with the admin credentials, you will be able to manage your ejabberd server from this web interface:
Further Configuration
For a deeper look into all the modules and options, have a look at the following ejabberd documentation:
- Ejabberd’s Listen Modules and Listen Options
- Ejabberd’s Top-Level Options
- Ejabberd’s Modules' Options
And with that, you’ve successfully setup your ejabberd XMPP server!
Written by Denshi.
Donate Monero at:
48dnPpGgo8WernVJp5VhvhaX3u9e46NujdYA44u8zuMdETNC5jXiA9S7JoYMM6qRt1ZcKpt1J3RZ3JPuMyXetmbHH7Mnc9C