Monero Node
The Monero cryptocurrency relies on a network of decentralized nodes to store the private transaction information and maintain consensus.
Running your own node will let you relay transactions and contribute to the Monero network by dedicating storage and processing power to the task. You can then connect to your node from a wallet (if you enable rps).
Some other benefits of a full node are:
- More reliable and trusted as opposed to using a public node
- More secure for RPC calls for payment processors
- The ability to mine using p2pool
- The ability to run a mining pool or solo mine*
*Note: Solo mining can be very unreliable and it is not recommended unless you have a very powerful computer.
Warning: Running a Monero node requires a lot of storage (at least 100GB) and a reasonable amount of memory and processing power. If you are hosting at home, make sure to use an SSD and not a hard disk drive, as advised by monerod.
Installation
Because of the nature of Monero as an ever-evolving decentralized project, it is advised to download and keep an up-to-date version of it for your node. This can be accomplished by downloading the software manually:
wget https://downloads.getmonero.org/linux64
tar -xvjf linux64
mv linux64/monero* /usr/bin/
If the hardware you are using is not based on the amd64 architecture (like a Raspberry Pi), the monero project also offers binaries for other architectures on Linux, to download and install them simply change the last part of the link (linux64) and the archive name, e.g. for arm64 (linuxarm8). The fastest way to find out which one to use in Debian is with the dpkg --print-architecture command.
Configuration
By default, Monero comes with no sample configuration files. Create one in /etc/monerod.conf using a text editor, and enter the following details:
# Configuration for monerod
# Syntax: any command line option may be specified as 'clioptionname=value'.
#         Boolean options such as 'no-igd' are specified as 'no-igd=1'.
# See 'monerod --help' for all available options.

data-dir=/var/lib/monero
log-file=/var/log/monero/monero.log
log-level=0

# Slow but reliable db writes
db-sync-mode=safe

# 1048576 kB/s == 1GB/s; a raise from default 2048 kB/s; contribute more to p2p network
limit-rate-up=1048576
limit-rate-down=1048576

# Be more generous to wallets connecting
disable-rpc-ban=1
Log files
The logfile at /var/log/monero/monerod.log will get very large, very soon if you do not limit it’s size. Add these options to /etc/monerod.conf to limit it’s size, and limit the creation of additional log
backups:
# Limit log size to 10 MiB
max-log-file-size=10485760
max-log-files=5
Making a Public Node
To advertise and let other users connect to your node, enable the following options:
restricted-rpc=true
# Bind to all addresses (useful if under NAT)
p2p-bind-ip=0.0.0.0
rpc-bind-ip=0.0.0.0
confirm-external-bind=1

public-node=true
User creation
Create a dedicated user to run monerod named monero:
useradd -m -d /var/lib/monero monero
Create the directories, and ensure the user has the relevant permissions on them:
mkdir /var/lib/monero && chown -R monero:monero /var/lib/monero
mkdir /var/log/monero && chown -R monero:monero /var/log/monero
Pruning the blockchain
When running a node, pruning allows the user to save data by only storing 1/8th of the ring signature information. Every “pruned” node contains a random 1/8th of the data, so the information is never lost. While this isn’t as helpful to the network as running a full node, it is a very reasonable option when storage space and bandwidth are limited. A pruned node will only use 1/3rd of storage compared to a full node.
To enable pruning, add the following options to /etc/monerod.conf:
prune-blockchain=true
# This option should speed up the syncing process
sync-pruned-blocks=true
Tor/I2P Setup
from the Monero documentation:
Only handshakes, peer timed syncs and transaction broadcast messages are supported over anonymity networks.
Monero nodes cannot sync the blockchain over Tor or I2P, but the node can broadcast transactions and let users connect over these anonymizing networks.
To set this up, first install Tor and/or I2P.
When creating a hidden service, create the following configuration:
Tor
Edit /etc/tor/torrc and add the following:
HiddenServiceDir /var/lib/tor/monerod

# For wallets connecting over RPC:
HiddenServicePort 18081 127.0.0.1:18181
# For other nodes:
HiddenServicePort 18083 127.0.0.1:18183
Now restart Tor:
systemctl restart tor
You can acquire the Tor address by running:
cat /var/lib/tor/monerod/hostname
I2P
Edit tunnels.conf (Which may be located in /etc/i2pd/ if you followed this guide) and add the following tunnels:
[monerod]
type = http
host = 127.0.0.1
port = 18283
keys = monerod.dat

[monerod-rpc]
type = http
host = 127.0.0.1
port = 18281
keys = monerod-rpc.dat
Now restart i2pd:
systemctl restart i2pd
You can acquire the I2P address by running:
printf "%s.b32.i2p
" $(head -c 391 /home/i2p/.i2pd/monerod.dat | sha256sum |xxd -r -p | base32 | sed s/=//g | tr A-Z a-z)
Configuring monerod
Then, in /etc/monerod.conf, add the following:
# Tor config
tx-proxy=tor,127.0.0.1:9050,10
anonymous-inbound=your-tor-address-here.onion:18083,127.0.0.1:18183,16

# I2P config
tx-proxy=i2p,127.0.0.1:4447
anonymous-inbound=your-i2p-address-here.b32.i2p:80,127.0.0.1:18283,16 # Maximum 16 simultaneous connections
Running the Node
Then, run this command to download the systemd daemon configuration for monerod. This will allow your node to run in the background and start automatically on boot as a service.
curl https://raw.githubusercontent.com/monero-project/monero/master/utils/systemd/monerod.service > /etc/systemd/system/monerod.service
Note: This configuration assumes that you’ve created a user named monero which runs the program monerod in it’s home directory, and which points to the configuration in /etc/monerod.conf. Edit any of these details in /etc/systemd/system/monerod.service if they don’t apply to your configuration.
Now reload the systemd service file:
systemctl daemon-reload
To run the node, restart the systemd service:
systemctl restart monerod
To monitor the node’s status at any time (for example, to check sync progress) check the log file using tail:
tail -f /var/log/monero/monerod.log
Connecting to your Node
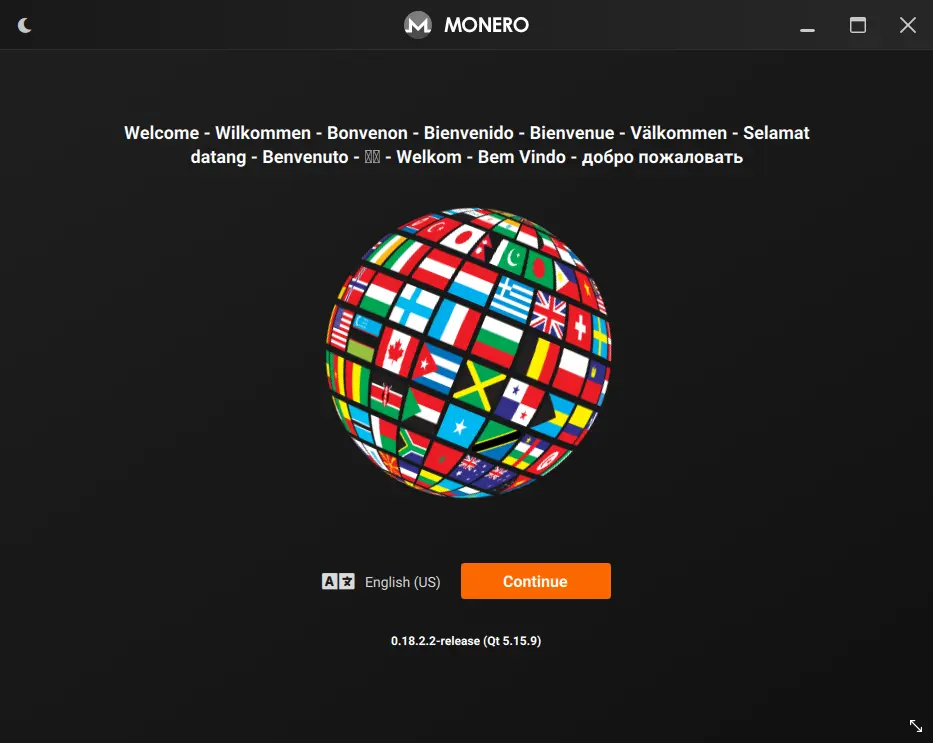
To connect to your node using the GUI wallet, first open it:
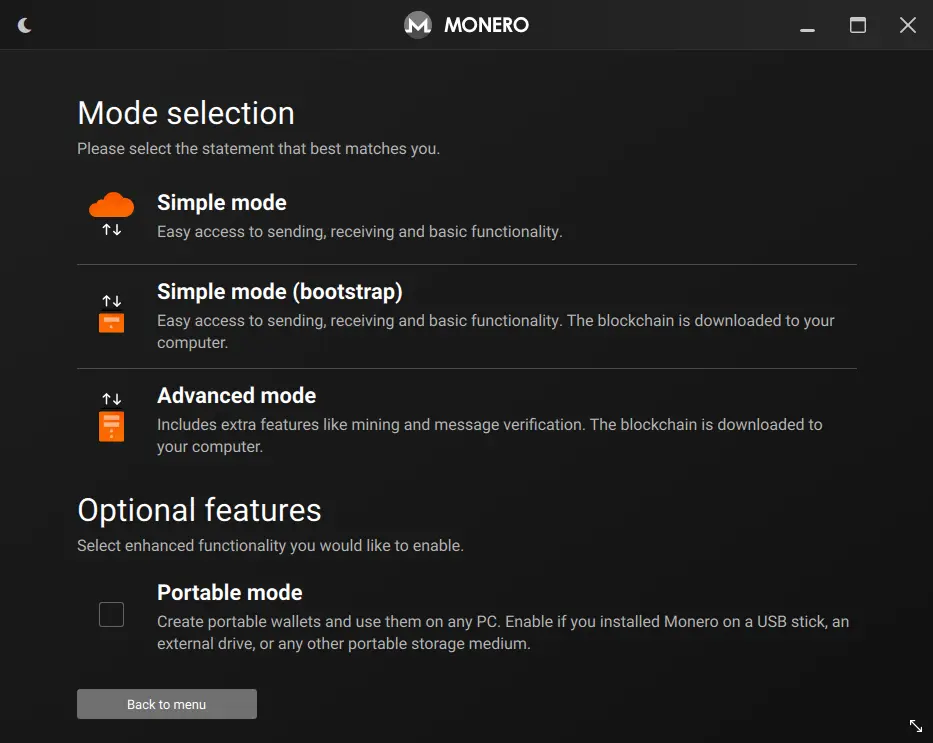
On the mode selection screen, make sure to pick Advanced mode:
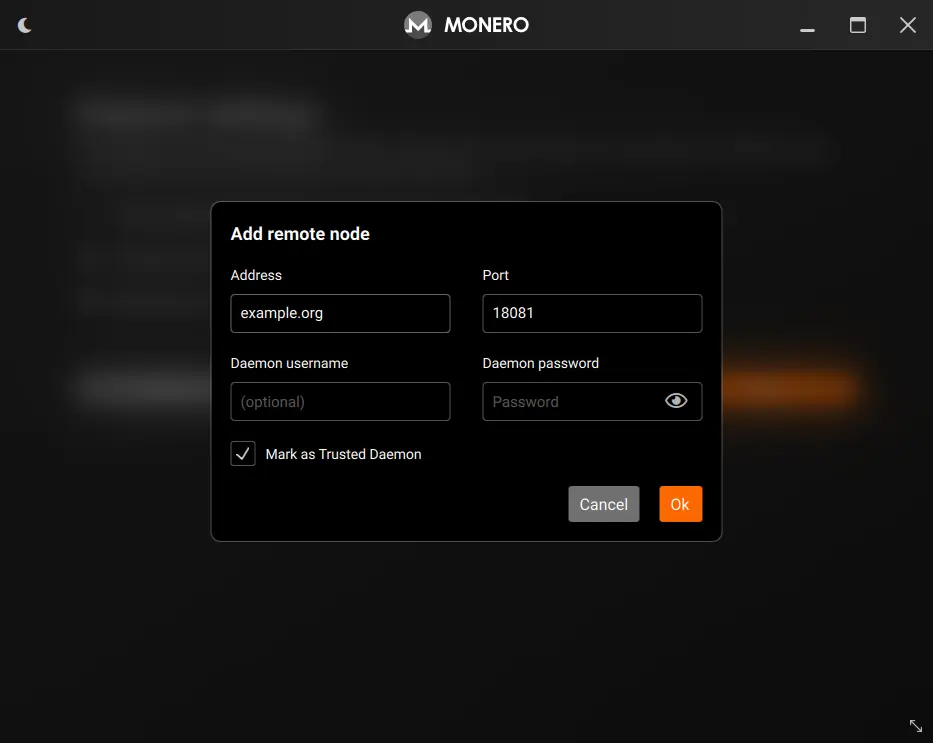
When you reach daemon settings, select the Connect to a remote node option, and then click add remote node.
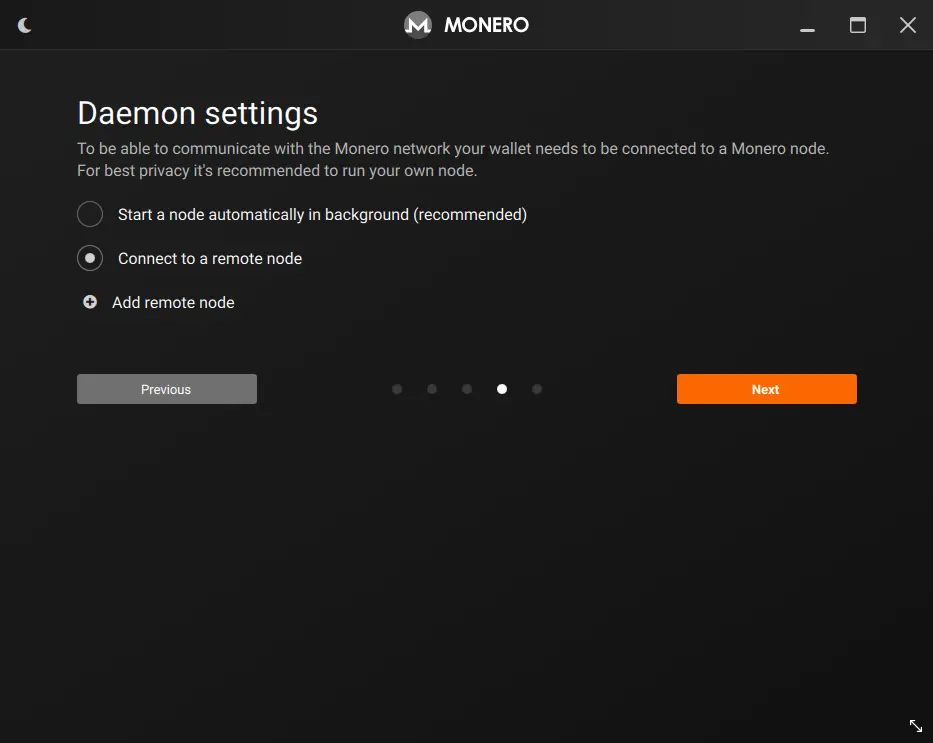
A prompt will appear, asking for your node’s details. Add your address, set the port to 18081, and make to click Mark as trusted daemon.
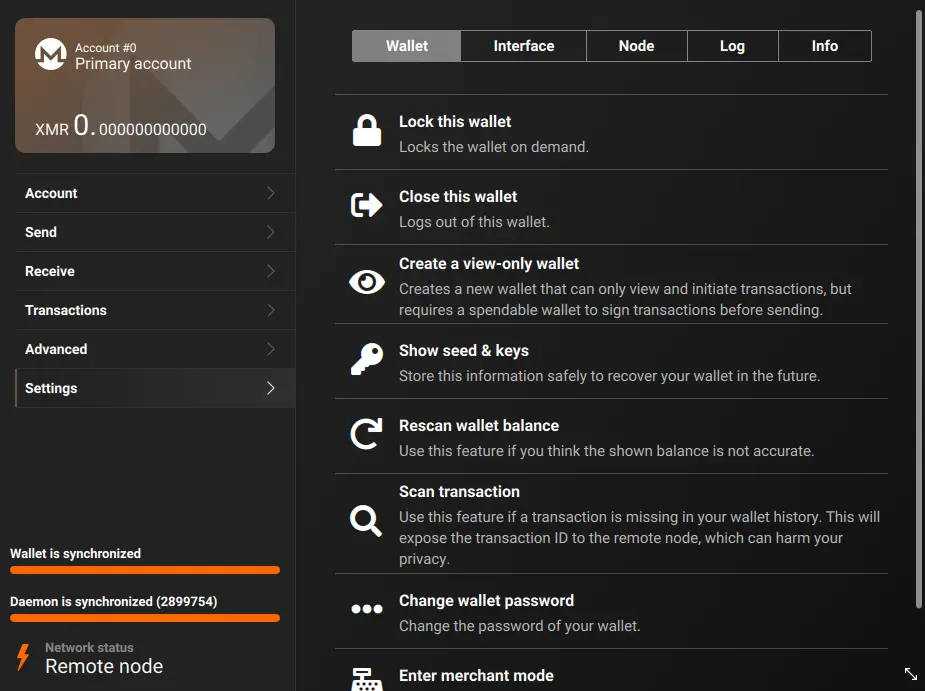
When you reach the main wallet screen, you’ll see “Remote Node” in the bottom-left corner. Now you can enjoy using your Monero node straight from your wallet!