Mumble is an open source, low latency and high quality voice chat software, being the best open source alternative to TeamSpeak. VoIP communications are mandatory encrypted by default using OCB-AES128, it has integrations for gamers (like overlays), it’s stable and it’s resource friendly.
The server can also be run behind Tor without any issue.
Installation
Mumble has a Debian repository for client and server, however it’s very outdated so we are going to build the server instead.
I suggest to build both binaries on your local machine and transfer the mumble-server to your remote server using scp.
Install dependencies:
apt install build-essential cmake pkg-config qtbase5-dev qtchooser qt5-qmake qtbase5-dev-tools qttools5-dev qttools5-dev-tools libqt5svg5-dev libboost-dev libssl-dev libprotobuf-dev protobuf-compiler libprotoc-dev libcap-dev libxi-dev libasound2-dev libogg-dev libsndfile1-dev libspeechd-dev libavahi-compat-libdnssd-dev libxcb-xinerama0 libzeroc-ice-dev libpoco-dev g++-multilib
Git clone the repo.
git clone https://github.com/mumble-voip/mumble.git && cd mumble
Initialize all the submodules.
git submodule update --init
Create a build directory and run cmake.
Cmake will create all the necessary files to build the mumble-server and client.
mkdir build && cd build && cmake ..
Build using cmake.
cmake
After the build you will now find a file named mumble-server, one mumble (which is the client) and a file named mumble-server.ini (aka the config file).
Running your Mumble server
If you built it on local machine you can check out how to move it to your remote server first.
After that, start with making your mumble-server executable and move it in /usr/bin.
chmod +x mumble-server && mv mumble-server /usr/bin
Create a folder in /etc/ move your config files there.
mkdir /etc/mumble && mv mumble-server.ini /etc/mumble
By default, mumble-server uses port 64738, so make sure to open that port on your firewall (if you’re using one), or whatever other port you selected on your configuration file. If you’re using ufw as your firewall, the command is:
ufw allow 64738
Now we can run the server passing the config and a superuser password that can be used to connect and authenticate as an administrator from any client
mumble-server -ini mumble-server.ini -supw <your_password>
Check if it’s running in the backgroud with ps aux.
ps aux | grep mumble-server
You will have an output like this.
root   127181  0.1  0.1 261064 21640 ?        Sl   19:18   0:01 ./mumble-server
root   127689  0.0  0.1 112956 22572 ?        Sl   19:19   0:00 ./mumble-server
Connecting to your mumble-server as a SuperUser
You will probably will be left with your mumble binary in the build folder on your local machine.
Now you should make it executable and move it in the /usr/bin folder.
chmod +x mumble && mv mumble /usr/bin
Run it the GUI with one command.
mumble
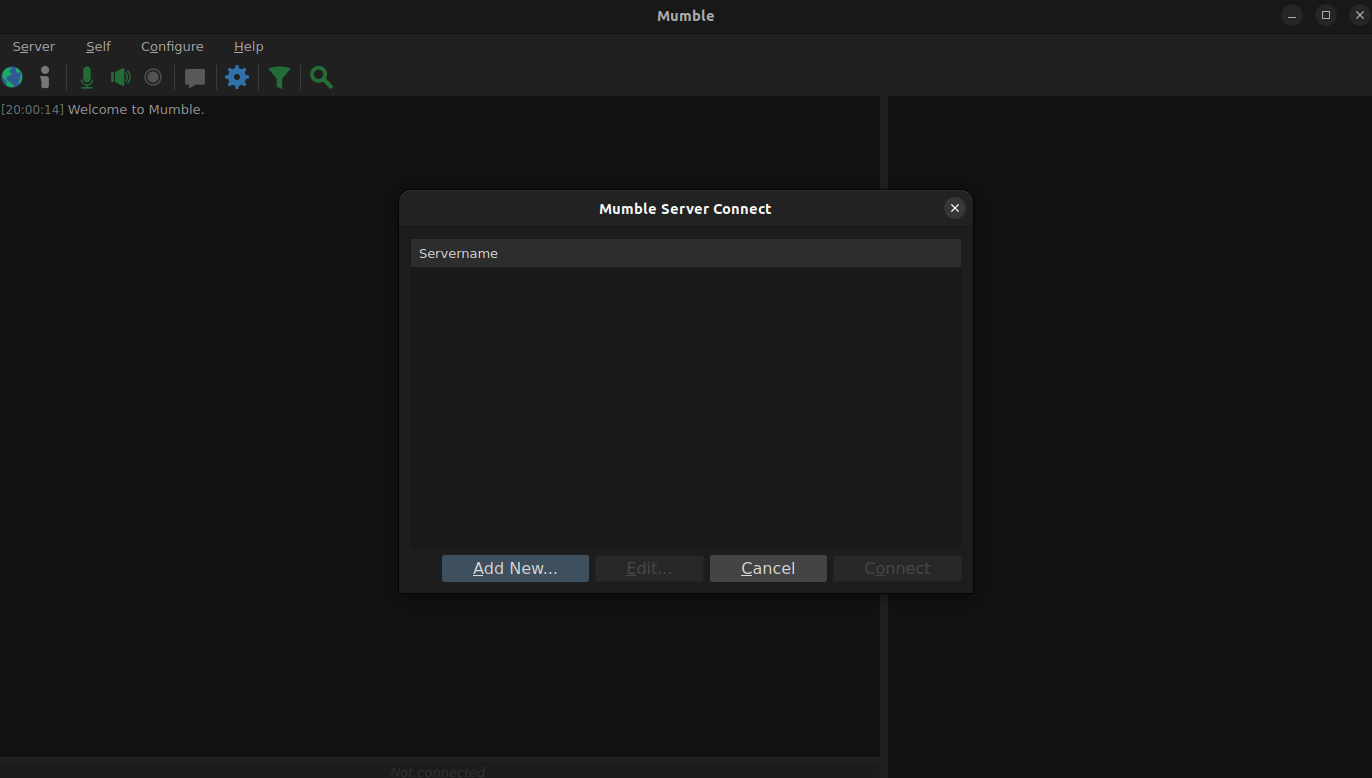
You will have something like this opening up.

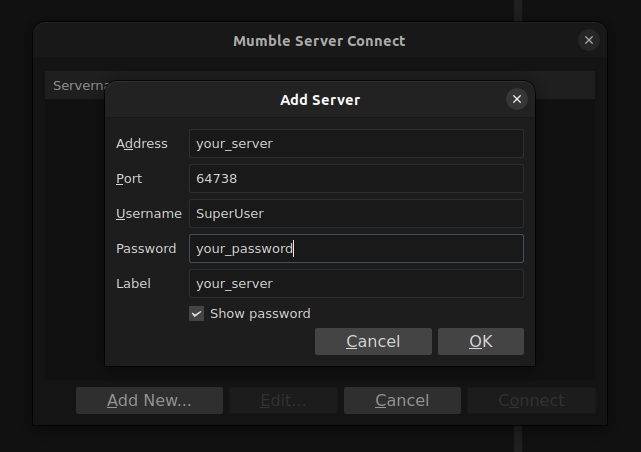
Click on the button Add New... and fill out the information need to connect to your server.

If you haven’t edited the port, 64738 will be default one.
Click on Ok, select your server from the list and click Connect.
Now you are connected to your very own Mumble server as a SuperUser!
Now, you will want to setup a regular user to be an administrator of the server. Follow the official documentation in order to do that, it is well-explained, so I won’t repeat it here.
Also, you might want to take a look at the options for your config file, since mumble let’s you set up a good amount of things, including a server password, a welcome message, and how to make your server public for the whole internet to see.
Extra
Move binary with scp
Move your binary to the folder ~ of your remote server.
scp <your_binary> root@<your_server_ip>:~
Written by NotMtth (Tor access warning)
Donate Monero at: donate.notmtth.xyz (OpenAlias)