 Rainloop
Rainloop is a webmail client, a program that allows you to access your email online like Gmail. It is useful to be able to access you email from a web browser because it allows you to easily access your email from any device with a web browser without any additional setup.
If you set up
 Nextcloud
then you do not need to install Rainloop because Nextcloud comes with a
webmail client. However, if all you want is a webmail client and you do
not need all of the extra things that Nextcloud provides, Rainloop would
be the better choice out of the two since it is less bloated and simpler
to install.
Nextcloud
then you do not need to install Rainloop because Nextcloud comes with a
webmail client. However, if all you want is a webmail client and you do
not need all of the extra things that Nextcloud provides, Rainloop would
be the better choice out of the two since it is less bloated and simpler
to install.
Instructions
First we will install the required packages for Rainloop with the following command:
apt-get install php php-common php-curl php-xml php-fpm php-json php-dev php-mysql unzip -y
Then we will download the community version of Rainloop, unzip it into an appropriate directory and fix all of the file permissions:
curl -L "https://www.rainloop.net/repository/webmail/rainloop-latest.zip" -o "rainloop.zip"
unzip rainloop.zip -d /var/www/mail
chown -R www-data: /var/www/mail
We have installed Rainloop itself, but now we need Nginx to serve the
client. We do that by adding the following text into the file
/etc/nginx/sites-available/mail (you can replace the bold text with
whatever is appropriate for your server).
server {

    listen 80;
    listen [::]:80;

    server_name mail.example.org ;
    root /var/www/mail;

    index index.php;

    access_log /var/log/nginx/rainloop_access.log;
    error_log /var/log/nginx/rainloop_error.log;

    location / {
        try_files $uri $uri/ /index.php?$query_string;
    }

    location ~ \.php$ {
        fastcgi_index index.php;
        fastcgi_split_path_info ^(.+\.php)(.*)$;
        fastcgi_keep_conn on;
        fastcgi_pass unix:/var/run/php/php-fpm.sock;
        include /etc/nginx/fastcgi_params;
        fastcgi_param SCRIPT_FILENAME $document_root$fastcgi_script_name;
    }
    location ~ /\.ht {
        deny all;
    }

    location ^~ /data {
        deny all;
    }
}
Then enable the site by linking it to the sites-enabled directory:
ln -s /etc/nginx/sites-available/mail /etc/nginx/sites-enabled/
Reload nginx:
systemctl reload nginx
Finally get certifications if you are using a new subdomain:
certbot --nginx
After that go to mail.example.org/?admin and login with the default
username and password: admin, 12345. Now you are in the admin panel and
the first thing you do should be to change the adminsitrator password by
looking in the security tab on the left.
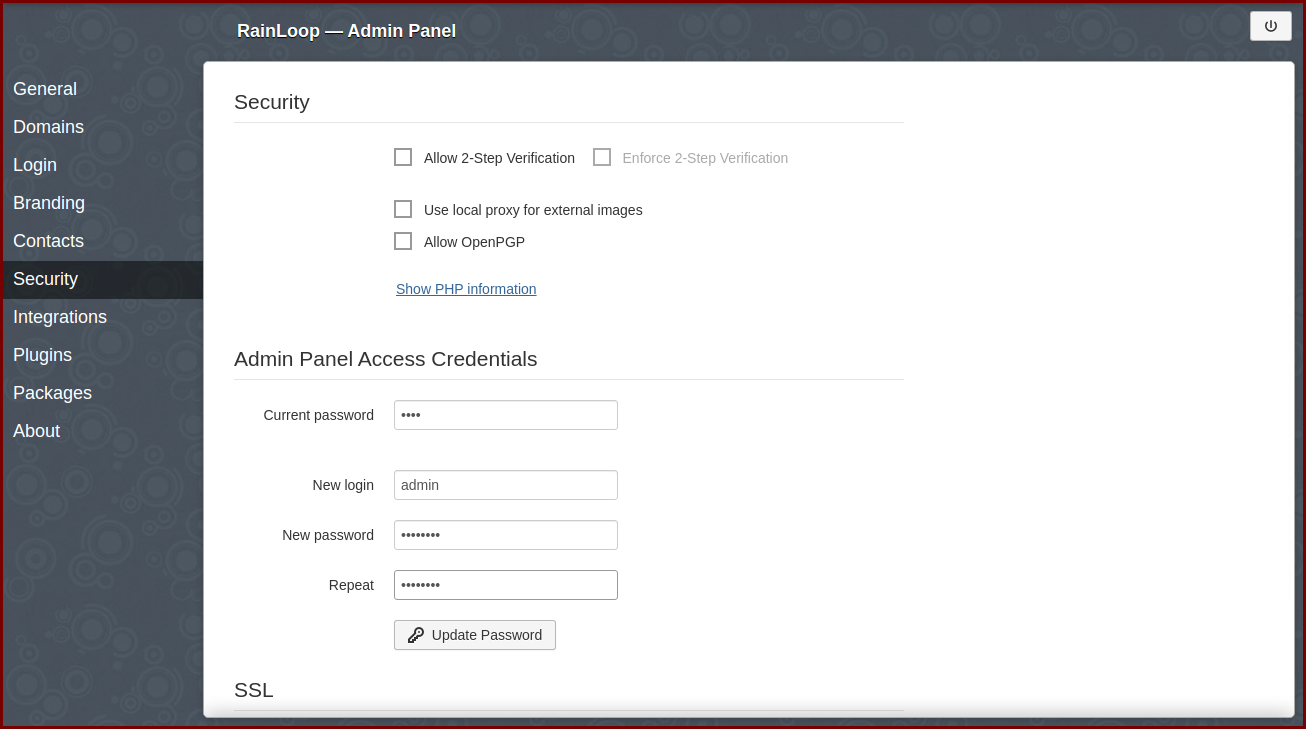
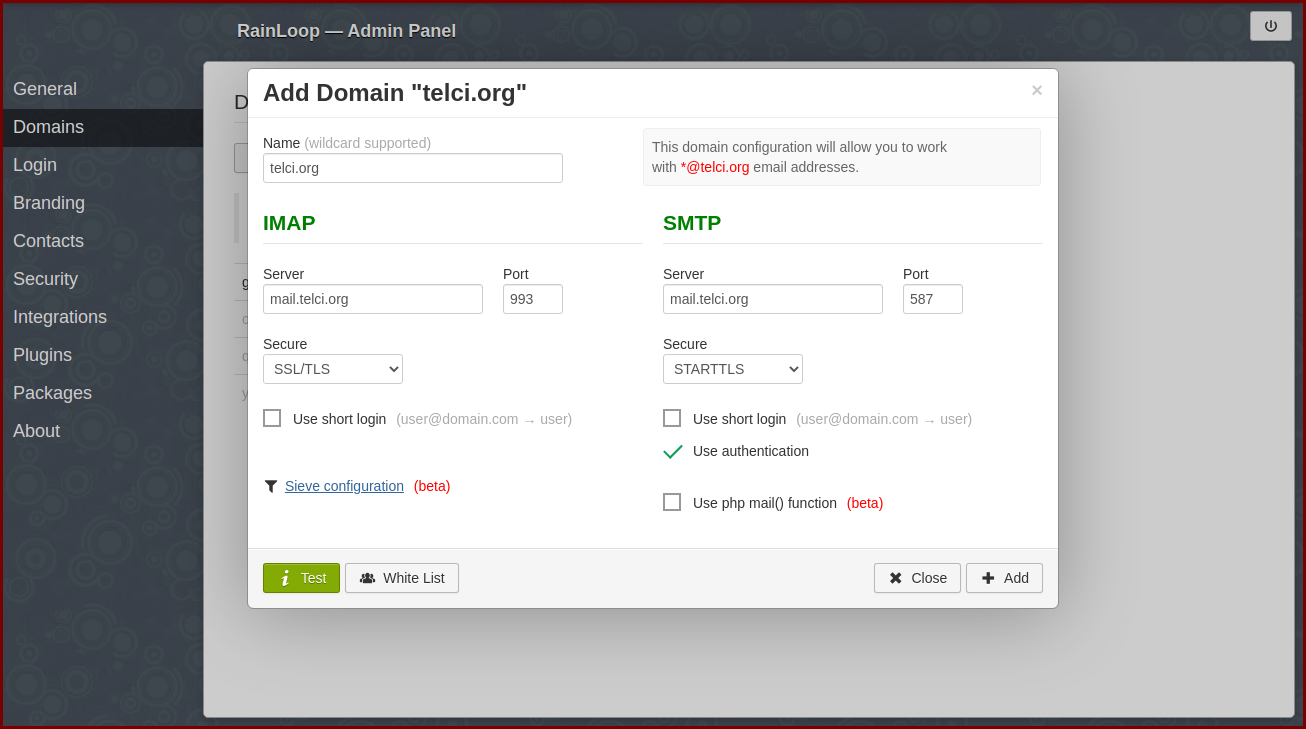
After securing the admin account you can go to domains and add your own email address.
Finally, go to mail.example.org and login with your email address and
password.
Contribution
Deniz Telci - XMR:
4AcKbpTUc3QX2zHYdh9HZwJAQyexdybFhF1WhXTFhxAcV9jgzB6kroqGZDgeW3rQqXEMYJioYo61kaLBqstwecty9Bjbr4v