Transmission allows you to send and receive files via the BitTorrent protocol. This tutorial shows you how to use Transmission to run a “seedbox” - a server for downloading and seeding torrents.
(For an explanation of BitTorrent, see Appendix 1.)
Installation
The Transmission daemon is available in the Debian repositories:
apt install transmission-daemon
Besides installing Transmission, this command creates:
- A user for running the service (
debian-transmission) - A default configuration file
(
/var/lib/transmission-daemon/info/settings.json) - A default service file
(
/etc/systemd/system/multi-user.target.wants/transmission-daemon.service)
Configuration
Transmission-Daemon
Any time you need to modify Transmission's configuration, you must stop
the transmission-daemon service. Otherwise, Transmission will
overwrite your changes.
service transmission-daemon stop
Open /var/lib/transmission-daemon/info/settings.json to view
Transmission's configuration. The file should look something like this:
{
    "alt-speed-down": 50,
    "alt-speed-enabled": false,
    "alt-speed-time-begin": 540,
    "alt-speed-time-day": 127,
    "alt-speed-time-enabled": false,
    "alt-speed-time-end": 1020,
    "alt-speed-up": 50,
    "bind-address-ipv4": "0.0.0.0",
    "bind-address-ipv6": "::",
    "blocklist-enabled": false,
    "blocklist-url": "http://www.example.com/blocklist",
    "cache-size-mb": 4,
    "dht-enabled": true,
    "download-dir": "/var/lib/transmission-daemon/downloads",
    "download-limit": 100,
    "download-limit-enabled": 0,
    "download-queue-enabled": true,
    "download-queue-size": 5,
    "encryption": 1,
    "idle-seeding-limit": 30,
    "idle-seeding-limit-enabled": false,
    "incomplete-dir": "/var/lib/transmission-daemon/Downloads",
    "incomplete-dir-enabled": false,
    "lpd-enabled": false,
    "max-peers-global": 200,
    "message-level": 1,
    "peer-congestion-algorithm": "",
    "peer-id-ttl-hours": 6,
    "peer-limit-global": 200,
    "peer-limit-per-torrent": 50,
    "peer-port": 51413,
    "peer-port-random-high": 65535,
    "peer-port-random-low": 49152,
    "peer-port-random-on-start": false,
    "peer-socket-tos": "default",
    "pex-enabled": true,
    "port-forwarding-enabled": false,
    "preallocation": 1,
    "prefetch-enabled": true,
    "queue-stalled-enabled": true,
    "queue-stalled-minutes": 30,
    "ratio-limit": 2,
    "ratio-limit-enabled": false,
    "rename-partial-files": true,
    "rpc-authentication-required": true,
    "rpc-bind-address": "0.0.0.0",
    "rpc-enabled": true,
    "rpc-host-whitelist": "",
    "rpc-host-whitelist-enabled": true,
    "rpc-password": "{224c4b5e26569d0baa8a161a68263253bbc69c26dnhxDeWg",
    "rpc-port": 9091,
    "rpc-url": "/transmission/",
    "rpc-username": "transmission",
    "rpc-whitelist": "127.0.0.1",
    "rpc-whitelist-enabled": true,
    "scrape-paused-torrents-enabled": true,
    "script-torrent-done-enabled": false,
    "script-torrent-done-filename": "",
    "seed-queue-enabled": false,
    "seed-queue-size": 10,
    "speed-limit-down": 100,
    "speed-limit-down-enabled": false,
    "speed-limit-up": 100,
    "speed-limit-up-enabled": false,
    "start-added-torrents": true,
    "trash-original-torrent-files": false,
    "umask": 18,
    "upload-limit": 100,
    "upload-limit-enabled": 0,
    "upload-slots-per-torrent": 14,
    "utp-enabled": true
}
Here are the options you should definitely look at:
download-dirspecifies where Transmission should save downloaded torrents. (You can probably leave this at the default of/var/lib/transmission-daemon/downloads.) If you change this, make suredebian-transmissionhas permissions to use the directory.peer-portspecifies what port Transmission should listen on to connect to peers. (You can probably leave this at the default of51413.)rpc-passwordspecifies the password required to control Transmission. Change this by typing it in as plaintext. When the Transmission service starts, it will be hashed and prefixed with a left curly bracket ({).rpc-portspecifies the port Transmission will listen on for remote commands. (You can probably leave this at the default of9091, unless you have another service listening on this port for some reason.)rpc-usernamespecifies the username required to control Transmission. The default istransmission, but feel free to change this.
Firewall
If peer-port-random-on-start is set to the default of false, your
firewall must allow TCP and UDP traffic on the peer-port. Assuming you
are using ufw, and peer-port is at the default of 51413, enter:
ufw allow 51413
Note on Port Randomization
If you set peer-port-random-on-start to true, your firewall must
allow both TCP and UDP traffic on the port range specified by
peer-port-random-low and peer-port-random-high.
Assuming you are using ufw, and peer-port-random-high is 65535,
and peer-port-random-low is 49152, enter:
ufw allow 49152:65535/tcp
ufw allow 49152:65535/udp
Starting the Service
After modifying and saving the transmission-daemon configuration,
start the service:
service transmission-daemon start
Transmission will hash your password in the configuration. You should be
able to connect to the daemon with transmission-remote locally on the
server using your credentials as shown next.
Controlling Transmission Locally
transmission-daemon runs your torrent session in the background. It is
controlled by an HTTP API that it serves on the rpc-port at
localhost. transmission-remote is the command line utility you can
use to control the daemon, and it was installed automatically when you
installed transmission-daemon.
Authentication
You first need to authenticate transmission-remote using the username
and password you set up in settings.json. There are 2 basic ways you
can do this.
.netrc File
The first method is via a .netrc file in your home directory. The
advantage of this method is that you do not need to provide your
credentials every time you run a transmission-remote command. The
disadvantage is that your Transmission password is stored in your home
folder as plaintext.
To add the necessary record to your .netrc file, run the following
command, where <username> is the rpc-username, and <password> is
the plaintext version of rpc-password in settings.json:
echo "machine localhost login <username> password <password>" >> ~/.netrc
Then, to authenticate, run:
transmission-remote --netrc
Subsequent transmission-remote commands will not require entering your
credentials.
--auth Flag
The second method to authenticate is to include an auth flag in every
transmission-remote command you execute. Substituting your credentials
for username and password, you can enter the following command to
list your torrents:
transmission-remote --auth=username:password --list
At this point, you should be able to use transmission-remote on your
server to manage your torrents.
Hosting Torrents
Here is a cookbook of common transmission-remote commands for hosting
torrents.
Add a torrent via a magnet link:
transmission-remote --add "magnet:link"
Add a torrent via a .torrent file:
transmission-remote --add "your.torrent"
List the status of your torrents (and get their numerical IDs):
transmission-remote --list
Get information about a specific torrent (where ID is the torrent ID
from the prior command):
transmission-remote --torrent=ID --info
Remove a torrent and keep its data (where ID is the torrent ID):
transmission-remote --torrent=ID --remove
Remove a torrent and delete its data (where ID is the torrent ID):
transmission-remote --torrent=ID --remove-and-delete
Get information about the current Transmission session:
transmission-remote --session-info
Get statistics about the current Transmission session:
transmission-remote --session-stats
Downloading Completed Torrents via Secure Shell
Completed torrent downloads will be saved in the directory indicated by
download-dir in your configuration. (This is
/var/lib/transmission-daemon/downloads by default.)
You should be able to download those files and directories from your
seedbox using tools like rsync, (s)ftp, and scp.
If this is sufficient for you, you do not need to configure Transmission for remote access.
Creating New Torrents
transmission-create is used to create torrents. It was installed
automatically on your server when you installed transmission-daemon.
You can use it on any machine that has it installed and has a copy of
the file or directory you want to share.
(transmission-edit is also available to edit .torrent files. It can do
things like add and delete tracker urls. However, this tool tends to be
more useful when working with other's .torrent files and less so when
creating torrents from scratch.)
Creating the .torrent File
Here is a template command for creating a .torrent file:
transmission-create --outfile "my.torrent" \
                    --comment "My cool torrent" \
                    --tracker "https://tracker1.example.org/announce" \
                    --tracker "https://tracker2.example.org/announce" \
                    "path/to/my/file/or/directory"
outfilespecifies where to write the .torrent file.commentspecifies a comment for the torrent.trackerspecifies a torrent tracker to use. You can have multiple of these.udp://open.tracker.cl:1337/announceis usually a good choice, but there are many others.- The path indicates the file or directory you want to make a torrent of.
Generating the Magnet Link
transmission-show is used to generate magnet links from .torrent
files, and it was installed when you installed transmission-daemon.
Given any .torrent file, you can run:
transmission-show --magnet "my.torrent"
Seeding Your New Torrent
First, copy the file or directory that you are hosting to the download
directory (download-dir) specified in the transmission-daemon
configuration. If the download-dir is at the default, you could write:
cp "the-file-or-directory-to-share" \
   "/var/lib/transmission-daemon/downloads/"
Then, add your torrent to Transmission via your .torrent file or magnet link:
transmission-remote --add "the-torrent-file-or-magnet-link"
Your server should begin seeding your torrent, and you can share it via the .torrent file or magnet link.
Warning: Make sure you copy the file or directory you are seeding to
the download-dir directory before adding the torrent to
Transmission. If you copy the source file/directory into your download
directory after adding the torrent, run transmission-remote to get
the ID of your torrent:
transmission-remote --list
Then, where ID is the ID of the torrent, run this command so
Transmission will know it already has the data:
transmission-remote --torrent=ID --verify
The torrent should then begin seeding.
Controlling Transmission Remotely
At this point, you should be able to manage your seedbox locally by
using transmission-remote on your server via secure shell. However, it
may be convenient to also configure the box for remote access. You can
do this by exposing Transmission's HTTP API, which includes a web app.
The Transmission web app acts as a graphical stand-in for
transmission-remote. You can manage your torrents and the daemon with
it.
Similar to transmission-remote itself, however, you cannot download
completed torrents via the web app. (That requires serving the files via
a different channel, whether that be rsync, sftp, scp, http(s),
etc. Serving completed torrents via http(s) is explained later.)
Exposing Transmission's HTTP interface to the internet additionally
allows you to control your seedbox from a different machine using
transmission-remote.
Configuring Remote Access
By default, transmission-daemon only allows RPC commands from
localhost. For remote access, it must allow connections from the IP
addresses you want to access the daemon from. The most direct way of
doing this is by disabling the whitelist, which allows all IP addresses,
but you can specify a whitelist if you like.
Stop transmission-daemon:
service transmission-daemon stop
Then, set rpc-whitelist-enabled to false in your configuration. This
makes it so that any IP address can connect and control
transmission-daemon. (You will just need your rpc-username and the
plaintext version of your rpc-password to authenticate.)
Alternatively, if you want to use the whitelist, set
rpc-whitelist-enabled to true, and set rpc-whitelist to a
comma-separated list of IP addresses. (Asterisks are used as wildcards.)
For example, you could write:
101.125.137.168,89.72.*.221
While you have the configuration open, take note of the value of
rpc-port, which is 9091 by default. This value will be necessary for
configuring remote access.
After saving your configuration, start transmission-daemon:
service transmission-daemon start
Running Nginx as a Reverse Proxy
It is possible to open remote access to transmission-daemon simply by
opening its rpc-port in the firewall, 9091 by default. This connection
will be run over insecure HTTP, so your username and password will be
sent unencrypted. While this may be acceptable when testing a system, it
is generally preferable to use a web server with TLS as a reverse proxy
to Transmission's HTTP interface.
If you are already running nginx with working TLS, allowing access to
Transmission's web interface simply requires adding a location block
to your server block in your nginx configuration. Assuming rpc-port
is 9091, and rpc-url is /transmission/ in your transmission-daemon
configuration, add the following block to your nginx configuration:
location /transmission/ {
        proxy_pass http://localhost:9091/transmission/ ;
}
Reload nginx so your changes takes effect:
nginx -s reload
At this point, if example.org is your domain, and you are connected
from a permitted IP address:
- The Transmission web app will be available at
https://example.org/transmission/web/. transmission-remotewill be able to connect tohttps://example.org/transmission. (Note the omission of the trailing forward slash.)
Serving Transmission at a Different Path
By default, Transmission serves it's interface at the path
/transmission/. You can change this in the configuration, but note
that your chosen path must start and end with a forward slash.
For example, to serve Transmission's interface at /~luke/torrents/:
- Stop the
transmission-daemonservice. - Set
rpc-urlin the configuration to your chosen path. That is/~luke/torrents/in this example. - Modify the
locationblock's path pattern andproxy_passurl in your nginx configuration to use the new path (and the correctrpc-port). For this example, that is:
location /~luke/torrents/ {
        proxy_pass http://localhost:9091/~luke/torrents/ ;
}
- Start the
transmission-daemonservice. - Reload nginx.
The Transmission web app will then be accessible at
https://example.org/~luke/torrents/web/. transmission-remote will be
able to connect to https://example.org/~luke/torrents.
Connecting via a Browser
Where example.org is your website, and /transmission/ is the
rpc-url in your transmission-daemon configuration, point your web
browser to https://example.org/transmission/web/. After entering your
credentials into the login (using your rpc-username and plaintext
rpc-password), you will be greeted by the web interface with a list of
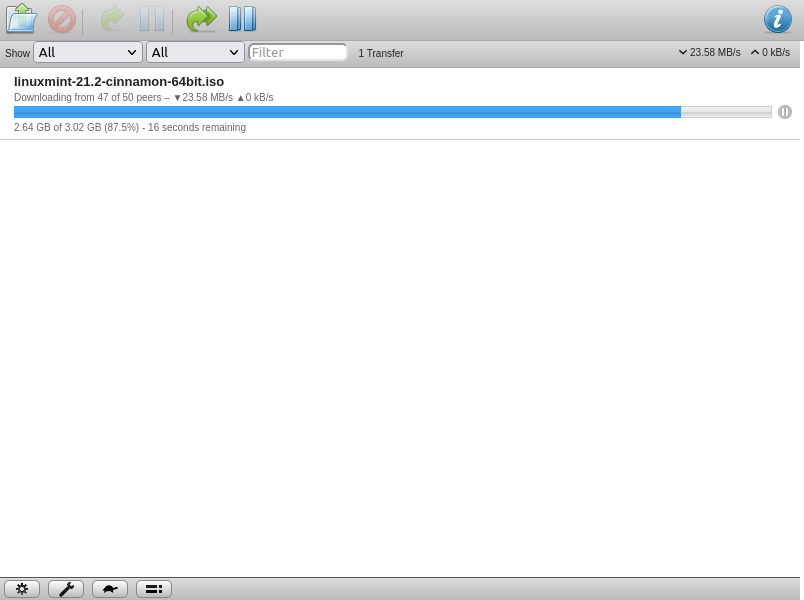
your torrents.
Here is a Transmission instance that is downloading one torrent:
Connecting via Transmission-Remote
You can control transmission-daemon on your server from other machines
that have transmission-remote installed. You do this by calling
transmission-remote with a url consisting of the domain name (or IP),
the rpc-port, and the path specified by rpc-url in the configuration
(/transmission/ by default) with the trailing forward slash omitted.
For example, after inserting your credentials for username and
password, assuming the rpc-url is at the default of
/transmission/, you could invoke the following command on your local
machine to list the status of the torrents on your server:
transmission-remote https://example.org/transmission \
                    --auth=username:password \
                    --list
Note how the rpc-url is /transmission/, but /transmission is
specified in the command.
Warning: The Transmission web app and transmission-remote both
allow you to make changes to Transmission's port settings. Be careful
change these, because you might also need to update your server's
firewall configuration.
Serving Complete Torrent Downloads via HTTP(S)
The Transmission web interface and transmission-remote do not allow
you to download completed torrents from your seedbox via HTTP(S).
However, in some scenarios, downloading via HTTP(S) may be preferable
where shell access and other supporting tools (rsync, scp, sftp,
ftp, etc.) are unavailable on the client machine. Serving completed
torrent downloads involves configuring nginx to serve the download-dir
of transmission-daemon.
(Serving completed torrent downloads via HTTP(S) does not require exposing Transmission's HTTP API and web app.)
Warning: The Transmission interfaces give you the option of saving
completed torrent downloads to directories other than the download-dir
specified in your transmission-daemon configuration. Downloading a
torrent to a different directory and not serving that directory with
nginx will prevent that completed torrent from being served to clients
via the static file server shown here.
Assuming you wish to serve your completed torrents from the directory
/downloads/ on your web server, and download-dir is at the default
of /var/lib/transmission-daemon/downloads/, you can add this
location block into the server block of your nginx configuration:
location /downloads {
    root /var/lib/transmission-daemon/downloads ;
    proxy_max_temp_file_size 0 ;
    autoindex on ;
}
Note how the trailing forward slash has been omitted in both the
location pattern and the root path.
The proxy_max_temp_file_size option prevents disk caching that would
potentially break nginx's ability to serve files larger than a few
gigabytes.
If you omit the autoindex option or set it to off, nginx will not
show a directory listing of your downloaded torrents. (You will need the
direct link to download a given torrent.)
After saving the configuration, reload nginx.
Where example.org is your website, and assuming autoindex is on,
opening https://example.org/downloads/ in a web browser should show a
list of links to download your completed torrents.
While downloading via HTTP(S) can be convenient, resuming interrupted downloads can be a nuisance. See Appendix 2 for tips on how to combat this.
Preventing Unauthorized Downloading
If you want to prevent others from downloading completed torrents via HTTP(S) from your seedbox, you have a few options:
- When defining the nginx
locationblock, you can use some random string for the path match pattern, like/DJRmdL8HPn. Only those who know the path will able to download your completed torrents. - You can protect the directory with a username and password using HTTP basic authentication.
Troubleshooting
journalctl can be used to view the logs of transmission-daemon. For
example, you could run:
journalctl | grep transmission-daemon
Transmission's documentation contains help and answers to common questions.
Appendix 1: What is BitTorrent?
Many protocols for sending files over the internet, such as Hypertext Transfer Protocol (HTTP) and File Transfer Protocol (FTP), operate on a "client-server" (or "server-client") model. A server will store a file. A client will send a request for the file from the server. If the request is accepted, the server will respond with the file.
In contrast, BitTorrent is a decentralized, peer-to-peer, file-sharing protocol. Instead of relying on a dedicated server, a file will be assembled by downloading it in chunks from many different hosts. Anyone who has the file (or pieces of it) can then help serve the file to others. This makes file-sharing via BitTorrent much less susceptible to data loss and downtime than the client-server model since the file can be replicated and shared across a potentially large number of independent hosts.
The individual hosts are called "peers". The process of a host offering their copy of the file for download to others is called "seeding". The set of peers collectively hosting the file is called a "swarm".
The peers usually find out about each other using "trackers", dedicated servers that help peers find those who possess or want a specific file. Trackers are identified by URLs. A peer can "announce" to a tracker that it possesses a specific file. If a peer wants to download a file, the peer can ask the tracker for peers that possess the file. Trackers do not actually transfer the torrent between peers. They simply facilitate peer-discovery.
The BitTorrent network also uses other mechanisms for peer-discovery, including a "DHT", or Distributed Hash Table. Similar to trackers, these help peers find each other. Unlike trackers, a DHT is entirely peer-to-peer as it is based on a distributed data structure rather than a dedicated server. The DHT that BitTorrent uses is called the Mainline DHT. Most modern torrent clients will give you the option of using it to help you find peers. (Transmission supports it.)
Before downloading a desired file or directory, you will need its .torrent file or magnet link. These are usually distributed via webpages, and they contain metadata and other information required for downloading the file, including:
- The cryptographic hash of the file for validating its integrity. (A .torrent file will also include hashes for individual chunks of the file.)
- The name of the torrent.
- A list of tracker URLs to use for finding peers.
Once the .torrent file or magnet link has been imported into a torrent client, the client will query the network to discover peers that possess the file. The swarm will then work together to send the user the file in chunks. The chunks will be cryptographically validated and assembled to create the final file. After the user has downloaded the file (or even if they only have pieces of it), they also can be part of the swarm by helping to seed the file to others who want it.
"Leeching" is when a user downloads torrents and does not seed them to others. This practice hurts the overall functioning of the swarm and will also usually reduce the bandwidth that other peers are willing to dedicate to you in the future. Always reseed. 🌱
Appendix 2: Reliable Downloading via HTTP(S)
Downloading via HTTP(S) can be very convenient when shell access is
unavailable. It can also be very troublesome with large files due to
interrupted or corrupted downloads. Thankfully, utilities like wget
and zsync can help combat this.
wget
wget supports resuming interrupted downloads. It isn't as robust for
this use case as other utilities (like zsync), but it can be
convenient because:
- It doesn't require any extra setup on your server.
- It comes preinstalled on most *nix systems.
Supposing you want to download a very large file from your web server and save it to your current directory, you might run:
wget https://example.org/downloads/large.file
If this command is stopped or interrupted, running it again with the
--continue flag will cause wget to resume your download:
wget --continue https://example.org/downloads/large.file
If your network connection is particularly poor, you can also specify
the --tries=0 flag. wget will retry connecting indefinitely, so you
don't need to run the command multiple times if it disconnects.
One major downside of using wget is that the resumption of the
download is based on the difference between the file length on the
server and the length of the partial file on your disk. No cryptography
or checksum is used to validate the file’s integrity.
wget also supports downloading directories, but this can be finicky.
You might need to experiment with the arguments depending on the
contents of the directory. For example, assuming directory listing is
enabled in the relevant directory on your web server, you might run a
command like:
wget --recursive --no-parent \
     https://example.org/downloads/large-directory/
The --recursive flag indicates that wget should download the
contents of the directory as well as its subdirectories up to 5 levels
deep.
The --no-parent flag indicates that wget should not download any
files at higher levels in the directory hierarchy.
Note: Enabling autoindex for a directory in nginx implicitly
creates index.html files in the directory and its subdirectories from
the perspective of HTTP(S) clients like wget. However, the --reject index.html flag is omitted in the above command because wget needs
the links in those index files to download all of the files in the
target directory. (In fact, for this reason, the above command might
potentially fail to download all the files in the directory if the
target directory contains index.html files.) Once the directory has
been downloaded to your disk, you would then need to delete the
index.html files that were created by the web server’s directory
listing in your downloaded copy. Additionally, the actual directory
structure created on your disk with this example would be
example.org/downloads/large-directory/, not large-directory/.
zsync
zsync is another option for more reliable HTTP(S) downloading.
The advantages of zsync include:
- It offers significantly more data validation than
wgetby using hashes and checksums. - By using the
-iflag, you can specify file chunks you have on disk from the same or similar downloads to potentially accelerate the current download.
The disadvantages of zsync include:
- It does not usually come pre-installed on *nix systems.
- Unlike
wget, it does not support downloading directories. It only supports files. - It must be installed on the client-side.
- It requires additional setup on the server-side.
zsync is available in the Debian repositories. Install it on your
server by running:
apt install zsync
(You will also need to install it on your client machine.)
On your server, change your directory to your torrent download
directory, /var/lib/transmission-daemon/downloads/ by default. Then,
run zsyncmake by providing the url and name of the file you want to
use zsync on:
zsyncmake -u "https://example.org/downloads/large.file" large.file
This will create a new file with the same name as your original file but
with the .zsync extension added: large.file.zsync in this case.
(Note that if the file you are sharing changes, you need to regenerate
the .zsync file.)
If you view your torrent download directory in a browser, and nginx has
autoindex turned on, you should notice the addition of the .zsync
file in the directory.
On your HTTP(S) client, where the provided url is the link to the new
.zsync file, run:
zsync "https://example.org/downloads/large.file.zsync"
If your download is interrupted, just run the command again, and zsync
will read your partial download, resume it, checksum it, and cleanly
assemble the target file, large.file.
If your downloads directory is protected with HTTP basic authentication,
you can specify your credentials by adding an -A flag before the URL:
zsync -A example.org=username:password \
      "https://example.org/downloads/large.file.zsync"
If you have a piece of the file with a different name or a different
version of the file, you can specify those pieces with the -i flag to
potentially reduce what zsync needs to fetch over the network:
zsync -i "large.file.piece" -i "large.file.old" \
      "https://example.org/downloads/large.file.zsync"
zsync will attempt to look for file chunks in large.file.piece and
large.file.old that can be used to help assemble large.file.
For example, if you have a Linux ISO on your computer, and you want to
download an updated version from your seedbox, there's a good chance
that only certain sections of the ISO changed from the version you
already have. You can specify the old version of the ISO you have with
the -i flag to potentially reuse chunks from the old version when
downloading the new ISO.
Written by: Luke Hamann